


Finished! Looks like this project is out of data at the moment!
Congratulations on completing another dataset! We're so appreciative of your incredible work!
FAQ
What is an electron microscope?
A traditional microscope uses light to illuminate a specimen, whereas an electron microscope uses a beam of electrons. Using an electron microscope rather than a light (photon) microscope allows us to look at smaller objects. This is because electrons have a much shorter wavelength than photons, and so are able to distinguish smaller objects.
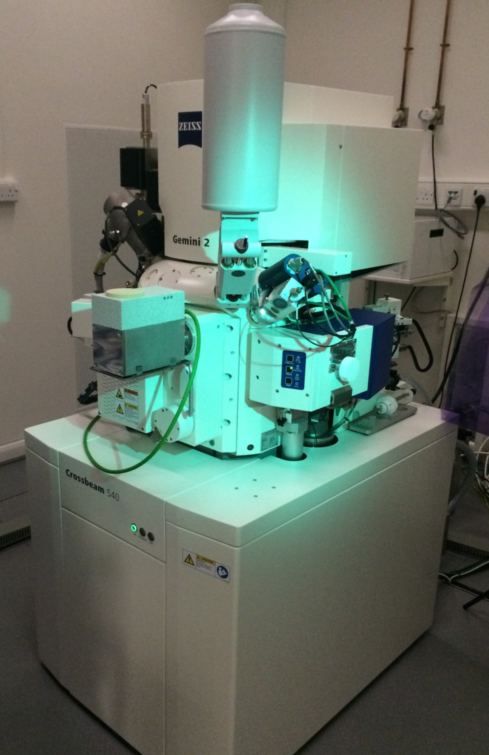
This is an electron microscope
What can you look at using an electron microscope?
Electron microscopes can be used to study a huge range of biological specimens, from tiny molecules such as proteins, to larger structures such as cells or tissues, and everything in between. Electron microscopy can be used to advance our understanding of many different processes, such as how healthy cells grow and develop, how bacteria and viruses infect our cells, how our immune systems fight infectious diseases and cancer, how our brains work and how we age.
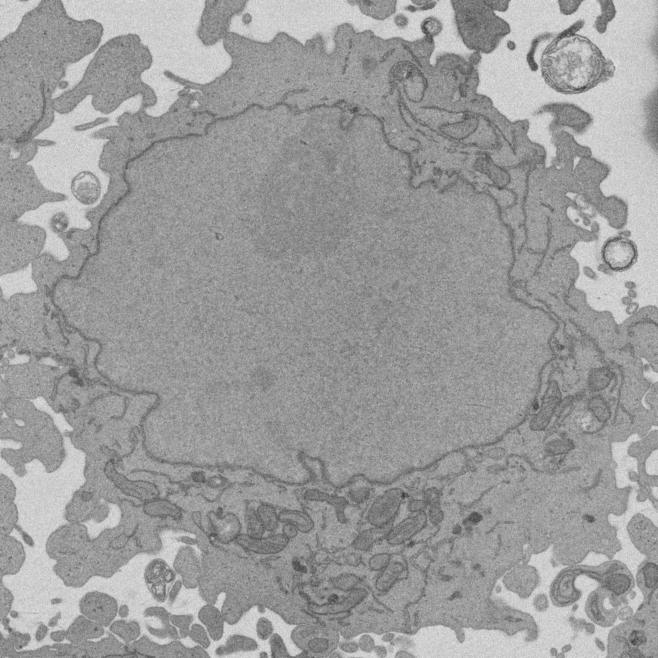
Image of a cell taken with an electron microscope. This particular cell is a HeLa cell, a type of cancer cell that is widely used in scientific research.
How do we study the feature of interest in the image?
An image taken with an electron microscope contains a huge amount of information. The information we want to extract from an image will depend on our particular research question. Until recently though, most electron microscopes could only give a 2D view from a very thin slice through a cell or tissue. This was a problem because humans aren’t very good at visualising 3D structures from a 2D image. Think of the difference between seeing a city on a 2D map, and actually visiting that city and moving through it and seeing how all the roads and buildings and rivers and people interact with each other in 3D.
How can we study specimens in 3D?
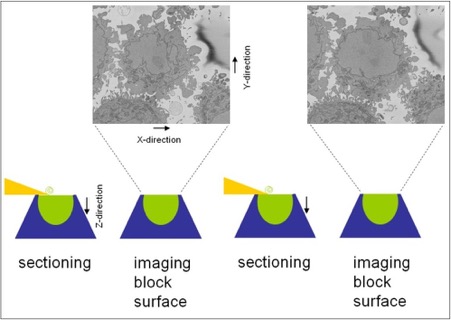
We can look at a cell in 3D using different types of microscope, the two we have used here are called a serial block face scanning electron microscope (SBF SEM) and a focused ion beam scanning electron microscope (FIB SEM). In these microscopes, the cell surface is imaged, and then a thin ‘section’ is cut away, and then the cell is imaged again. A diamond knife is used to cut the sections away in the SBF SEM and a highly focused beam of heavy ions is used in the FIB SEM. These microscopes can cut sections so thin that it would take 2,000-20,000 sections to cut through the width of a single human hair! This process of cutting and imaging creates a series of 2D images.
Serial block face scanning electron microscopy
How can we generate a 3D model from lots of 2D images?
One way to convert these 2D images into a 3D model is to draw around the feature(s) of interest. This is known as ‘segmentation’. We also call it ‘advanced colouring in’!

Here's Anne segmenting an image in our lab
In this image the cell's nucleus is "segmented", with the annotation overlay toggling on and off for clarity
How can this be used to generate a 3D structure?
A 3D model of the cell can be created by combining the segmentations from the series of 2D images produced by the serial block face scanning electron microscope. The individual segmentations are stacked together to create a 3D surface. It is much easier for humans to understand this 3D nuclear envelope, and to compare it to diseased nuclear envelopes, than it is to understand the 2D images showing a very small part of the structure. In the example below, you can just make out the individual segmentations as the approximately horizontal ridges on the 3D surface.
3D reconstruction of 2D segmented images of a nucleus from our first Etch A Cell project
Is this ER or not?
If you're not sure whether a certain blob is ER or not try moving up and down through the 3D structure using the flipbook - sometimes seeing a slice above or below the one you're classifying on will clarify whether the blob you're looking at is ER or something else. Moving up or down a slice or two can really clarify things, but don't forget to move back to your original slice to segment. Please also take a look at our "Not ER! Please don't draw on...' entry in this Field Guide.

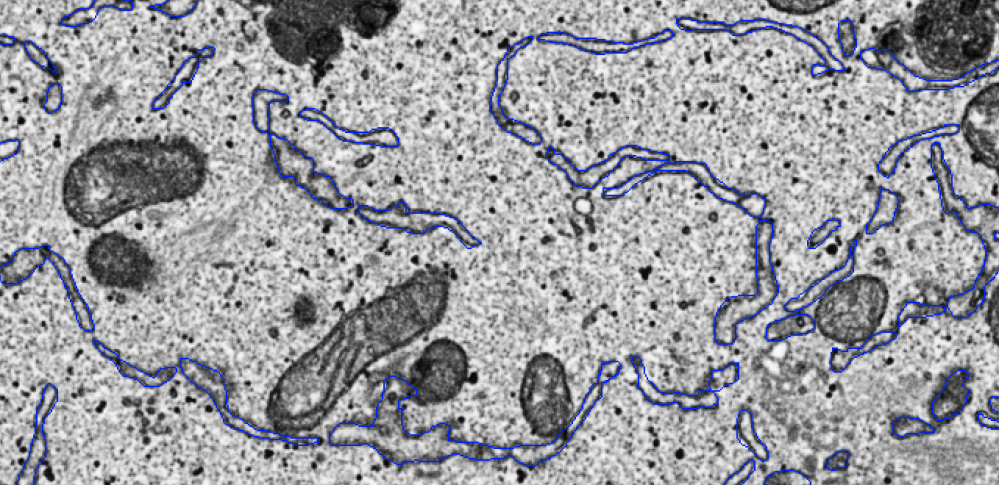
What shape is the ER?
The ER can come in a broad range of shapes and sizes - just see how different the ER (outlined in blue) can look in the image below! For more examples, take a look at the other galleries in this Field Guide.

What should I do when the ER goes off the edge of an image?
Occasionally the ER may be cropped at the edge of an image, as you can see in the examples below. Please still draw around what you can see of this cropped ER - we can stitch the images back together later!


What do I do if there is a hole in the ER?
Occasionally there may be holes inside of the ER blob or worm you are drawing around. These holes are naturally occurring parts of the ER and it is important to be able to distinguish the holes to allow this part of the 3D reconstruction to be appropriately hollow. As shown in the image below, please draw around these holes.

How do I delete a line?
If you want to delete a line, just click on that line and click the cross icon in the black circle (which you can see in the image below).

Do the lines have to touch when I finish tracing around a single structure?
You can draw multiple lines, so take your time and be as accurate as you can! Use the Zoom function if you need to see the image in more detail. Don't worry if your lines don't match up perfectly! If you make a mistake or would like another go, select the line you want to delete and click on the cross icon.
I’ve accidentally drawn around the ER in the wrong page of the flipchart, is this a problem?
Don't worry, we can still use your annotations!
Is there a save button to come back to the same image later on/on a different day?
Unfortunately we don't have a save tool, please just do what you can. click 'Done', and come back to visit us another day!